How-To: Duck Tape® 3D Star
How-To: Duck Tape® 3D Star
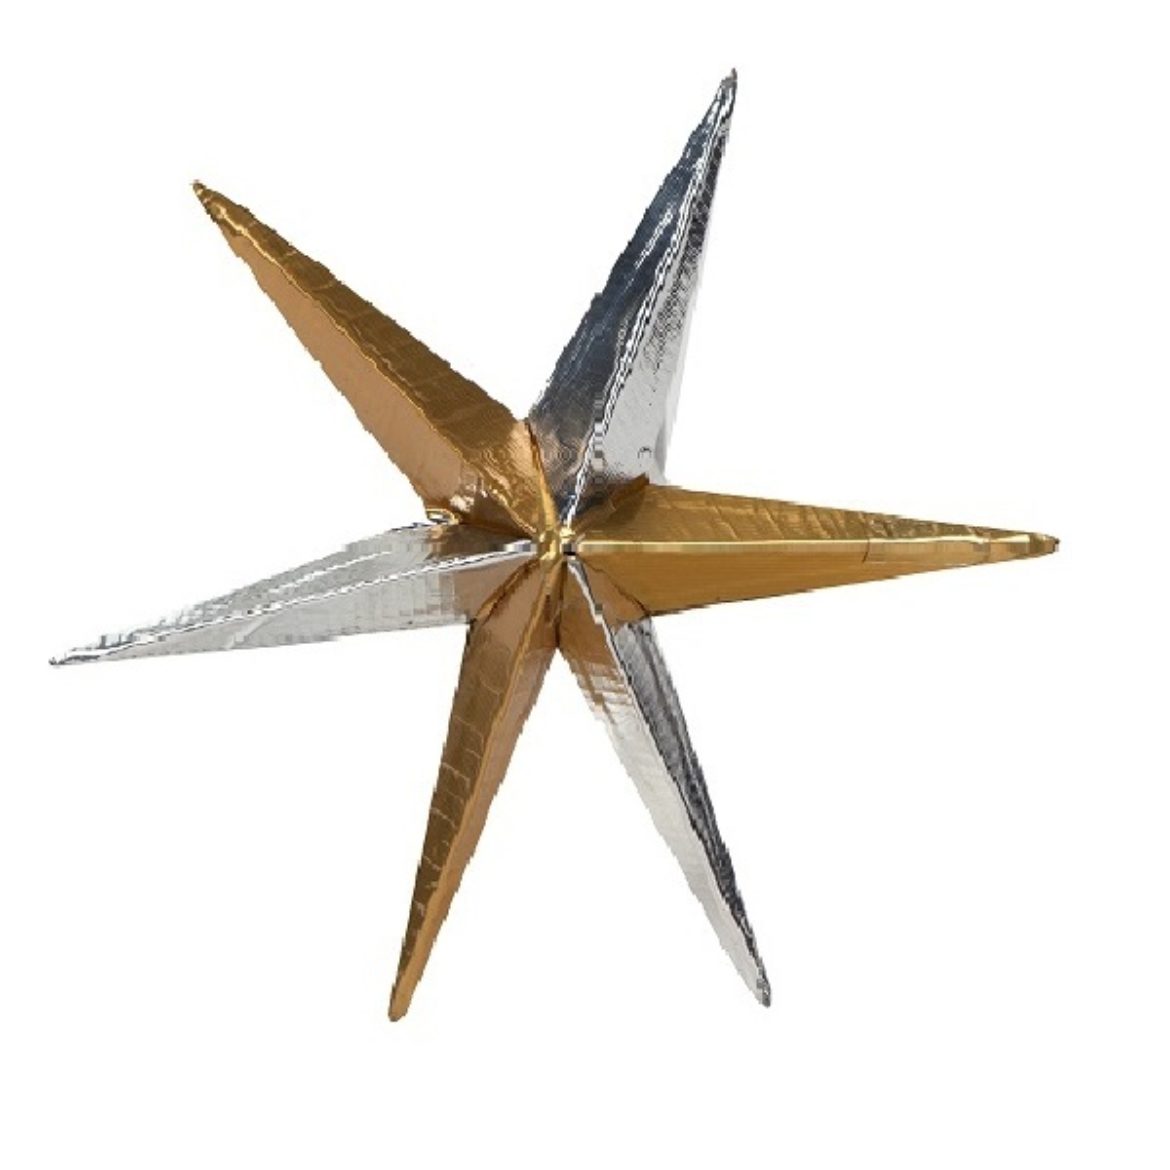
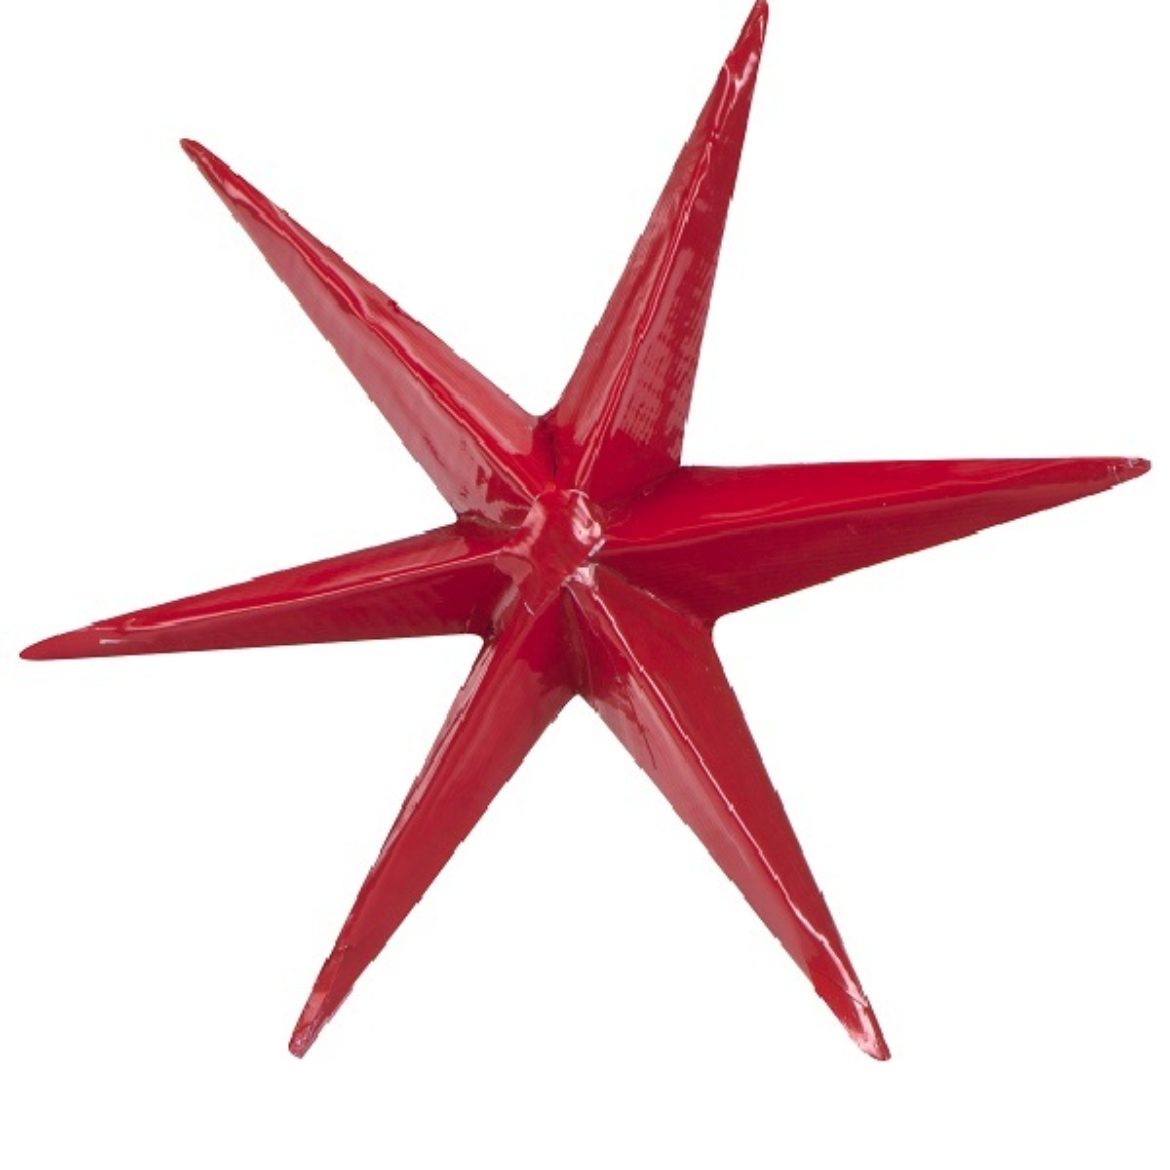
Top off your tree this year with the fun of Duck Tape®!
Tutorial
Advanced
60 Minutes
Supplies & Tools
- Duck Tape®
- Scissors
- Craft Knife
- Ruler
- Card Stock
- Crafting Board
Scroll down for step-by-step directions.
Disclaimer - If the listed tape type is not available, there's no need to worry. All of our crafts can be adjusted to use whatever tape you have on hand!
Directions
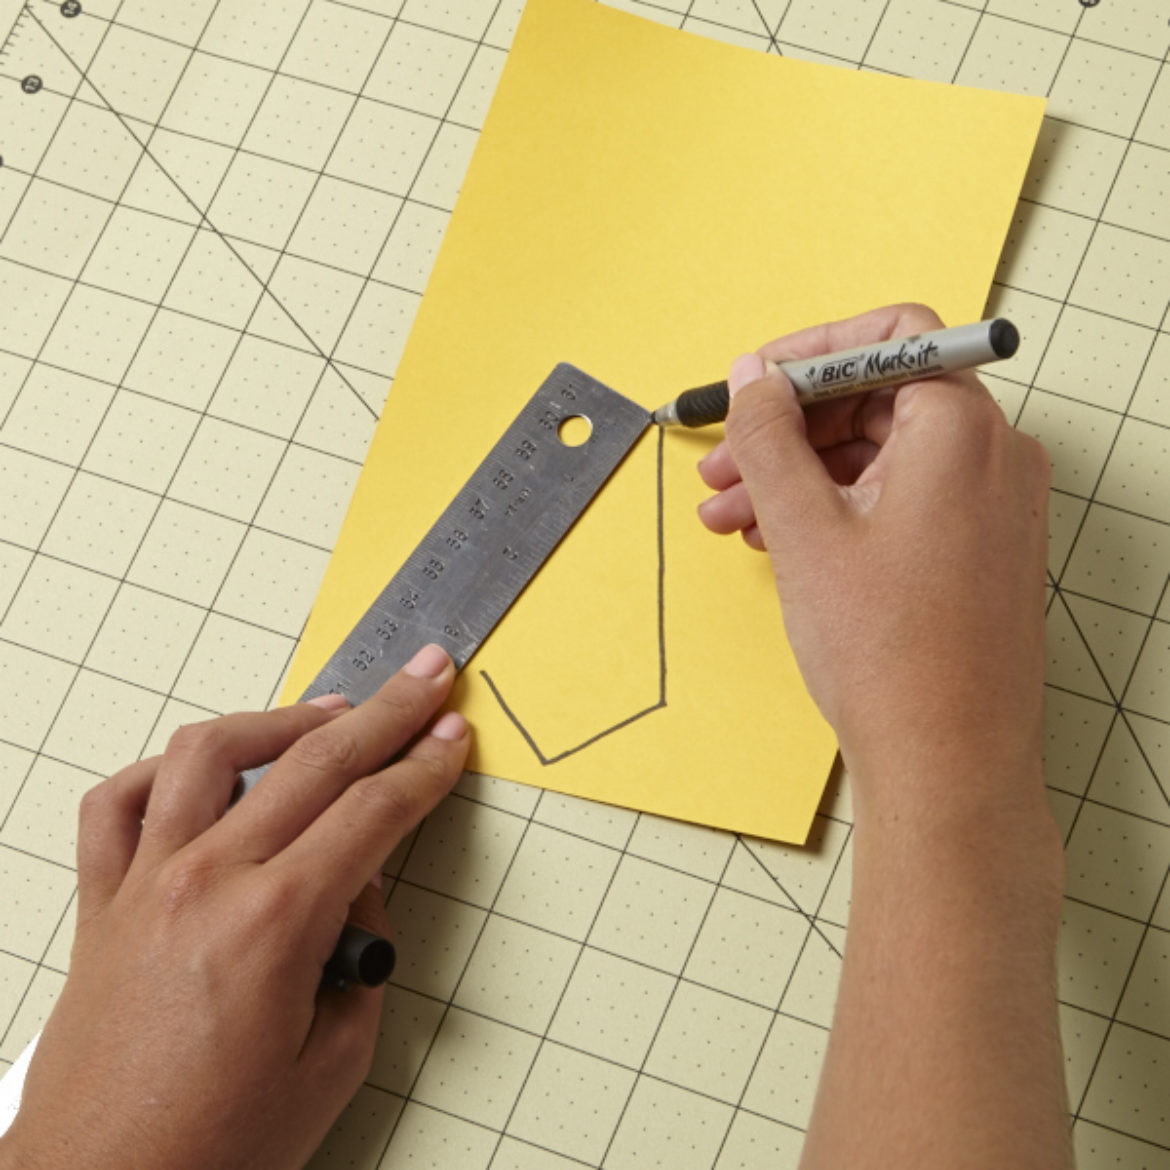
Step 1
Draw a kite shape on your card stock, making sure the two long sides measure 3 in. and the two shorter sides measure 1 in..
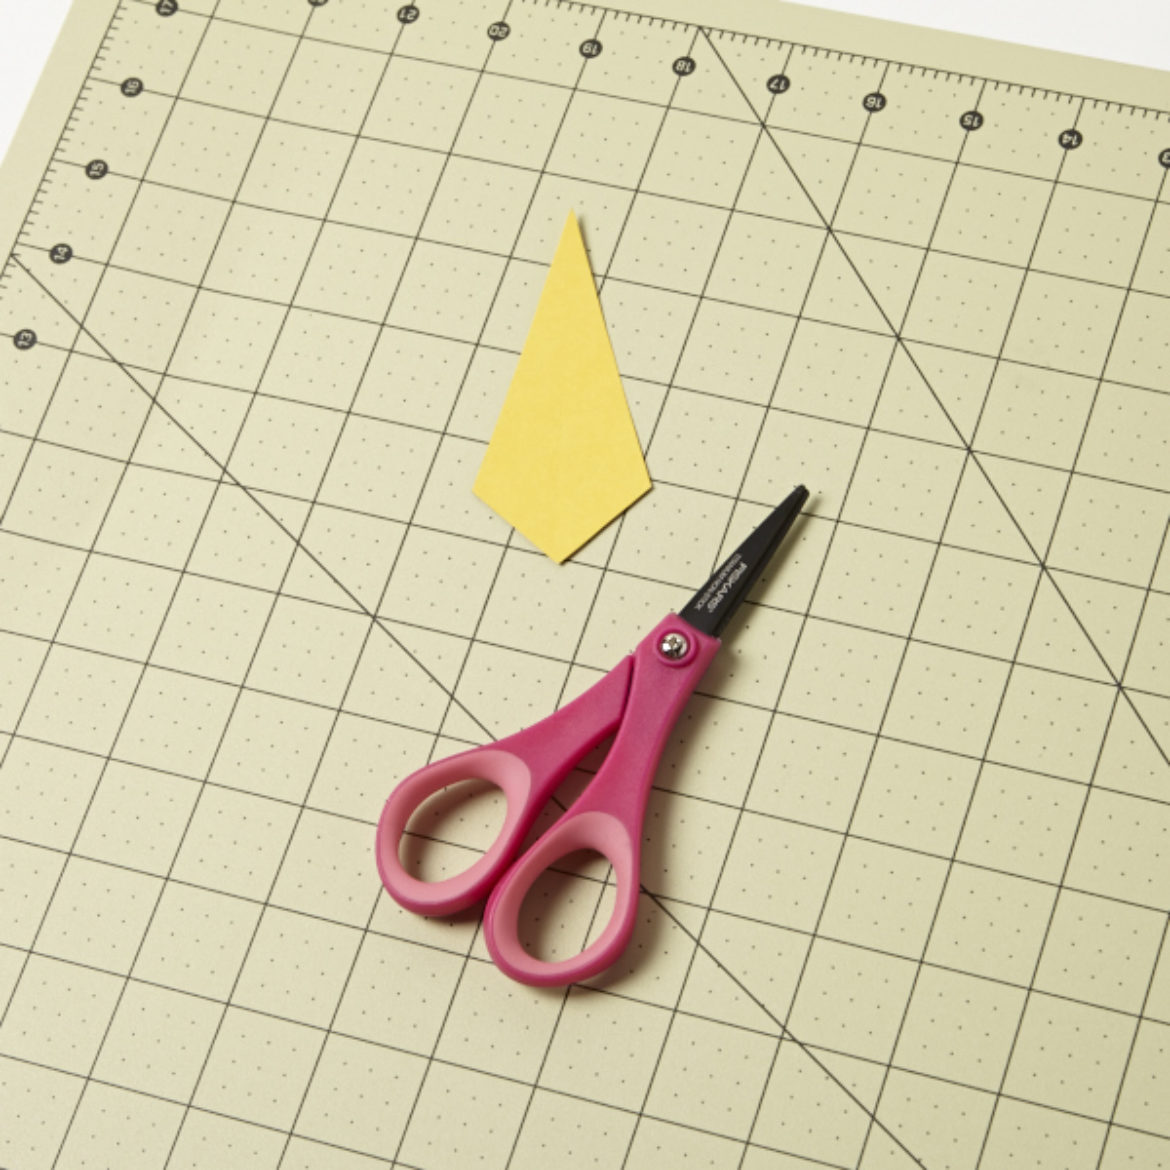
Step 2
Cut your kite shape out and use it as a stencil to create a total of 12 identical kites.
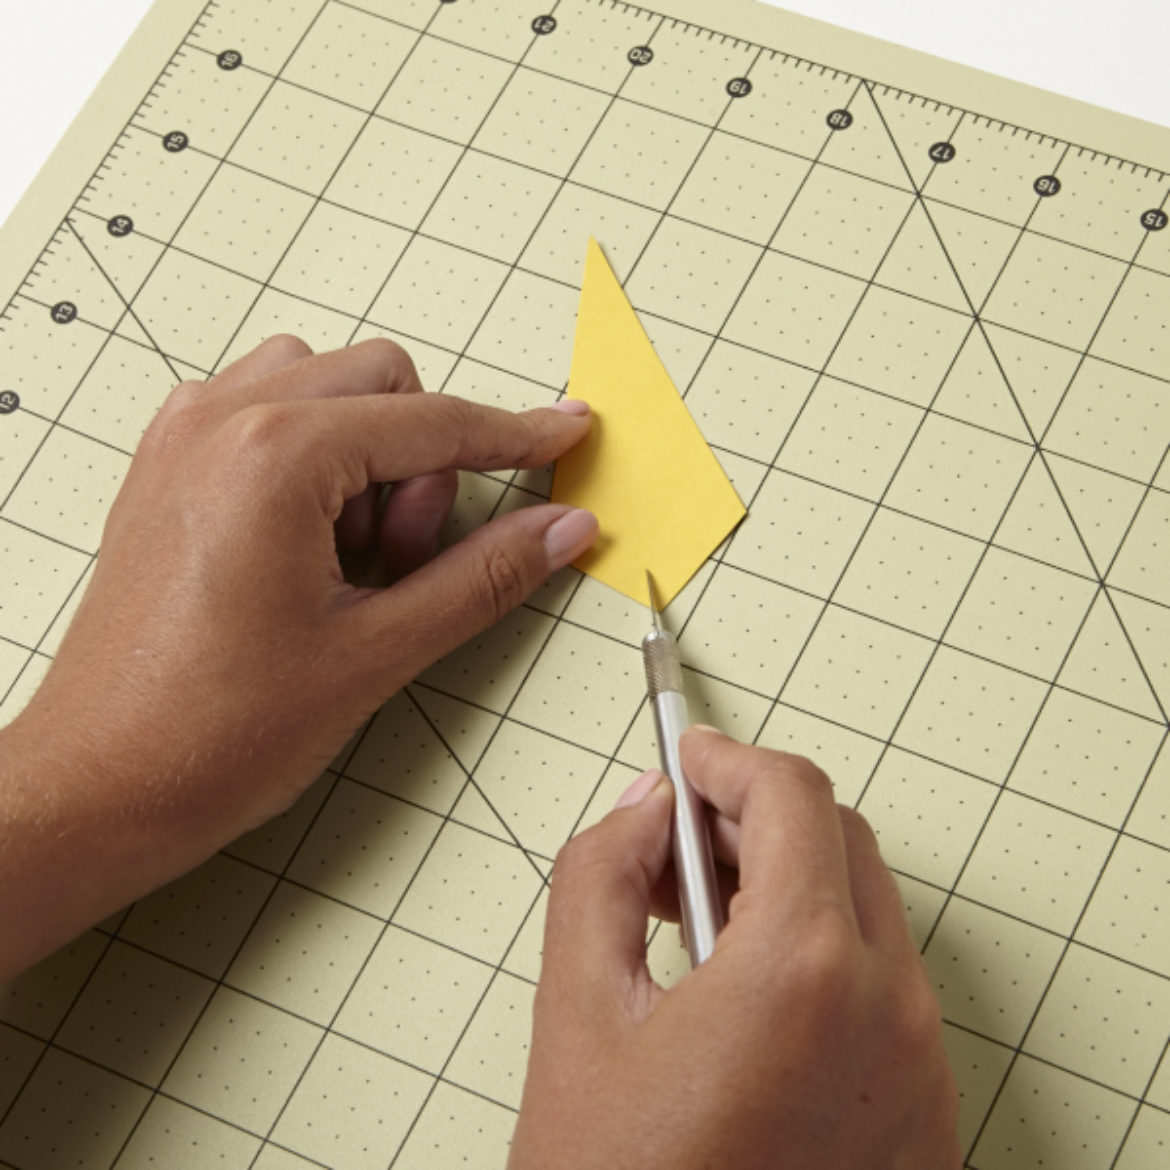
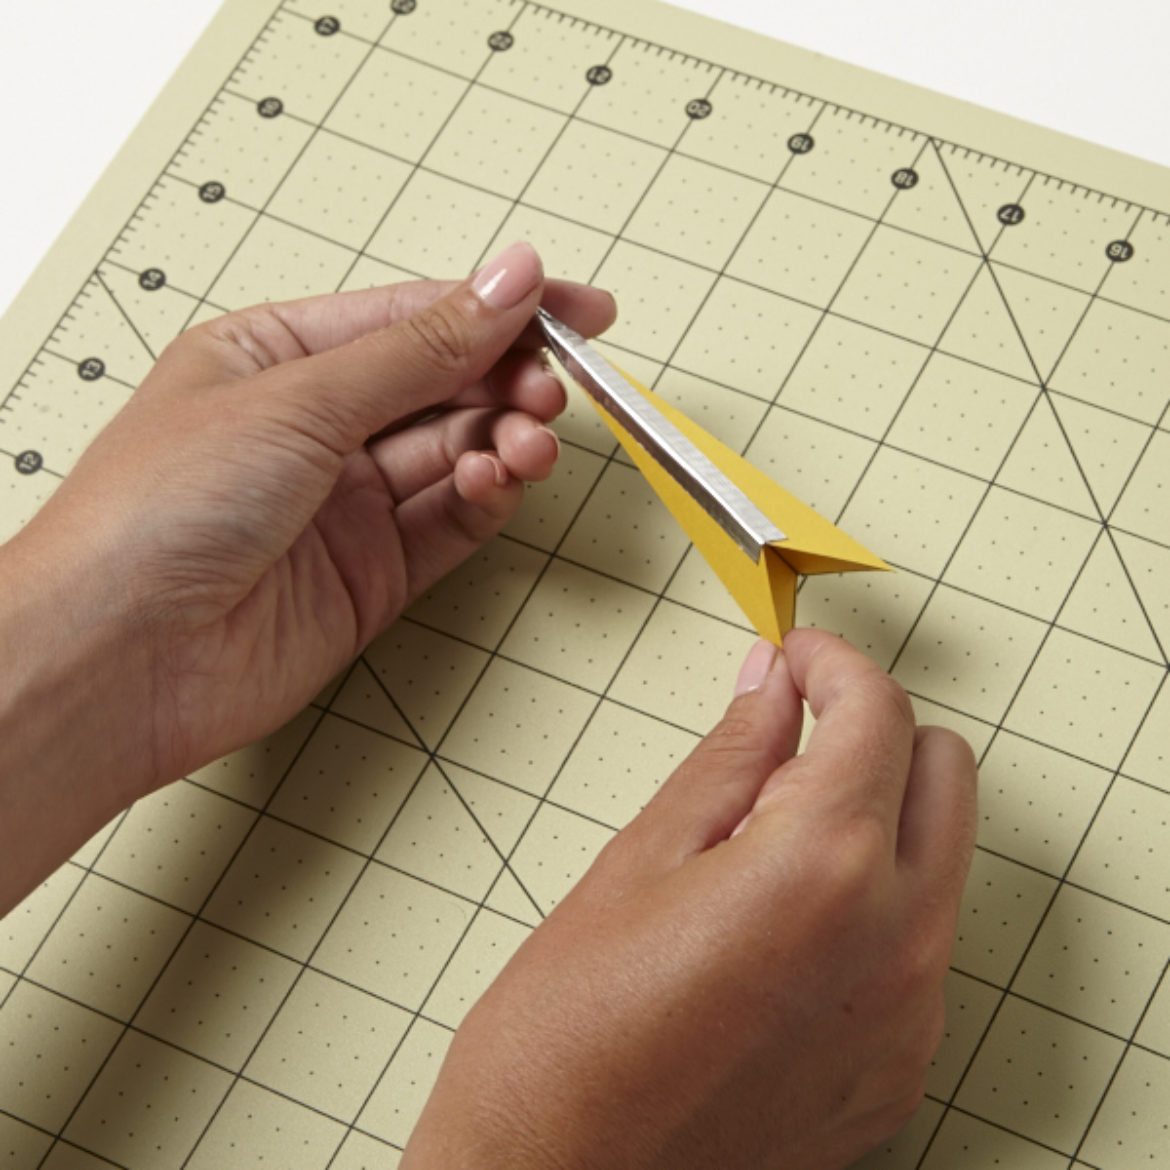
Step 3
Using your craft knife and ruler, lightly slice a line down the center of each kite shape without cutting all the way through. This will allow your kite to fold easily.
Step 4
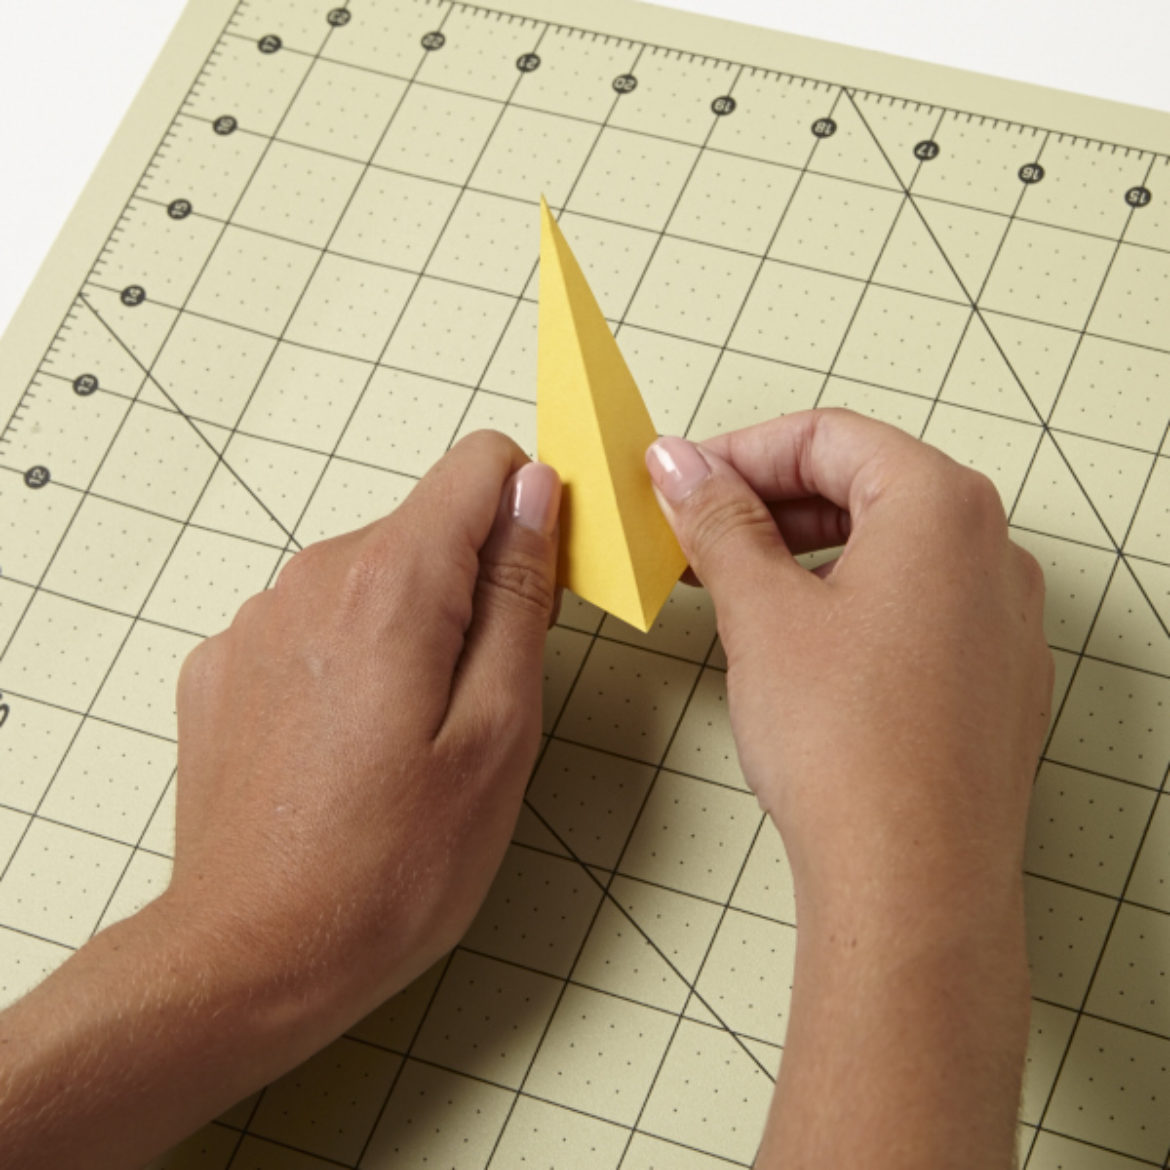
Fold each kite along the line you just created with your craft knife. Repeat this for all of your kites.
Step 5
Put two of your kites together and tape both of the long edges together to create a 3D shape. Repeat this step so you have a total of six 3D shapes.
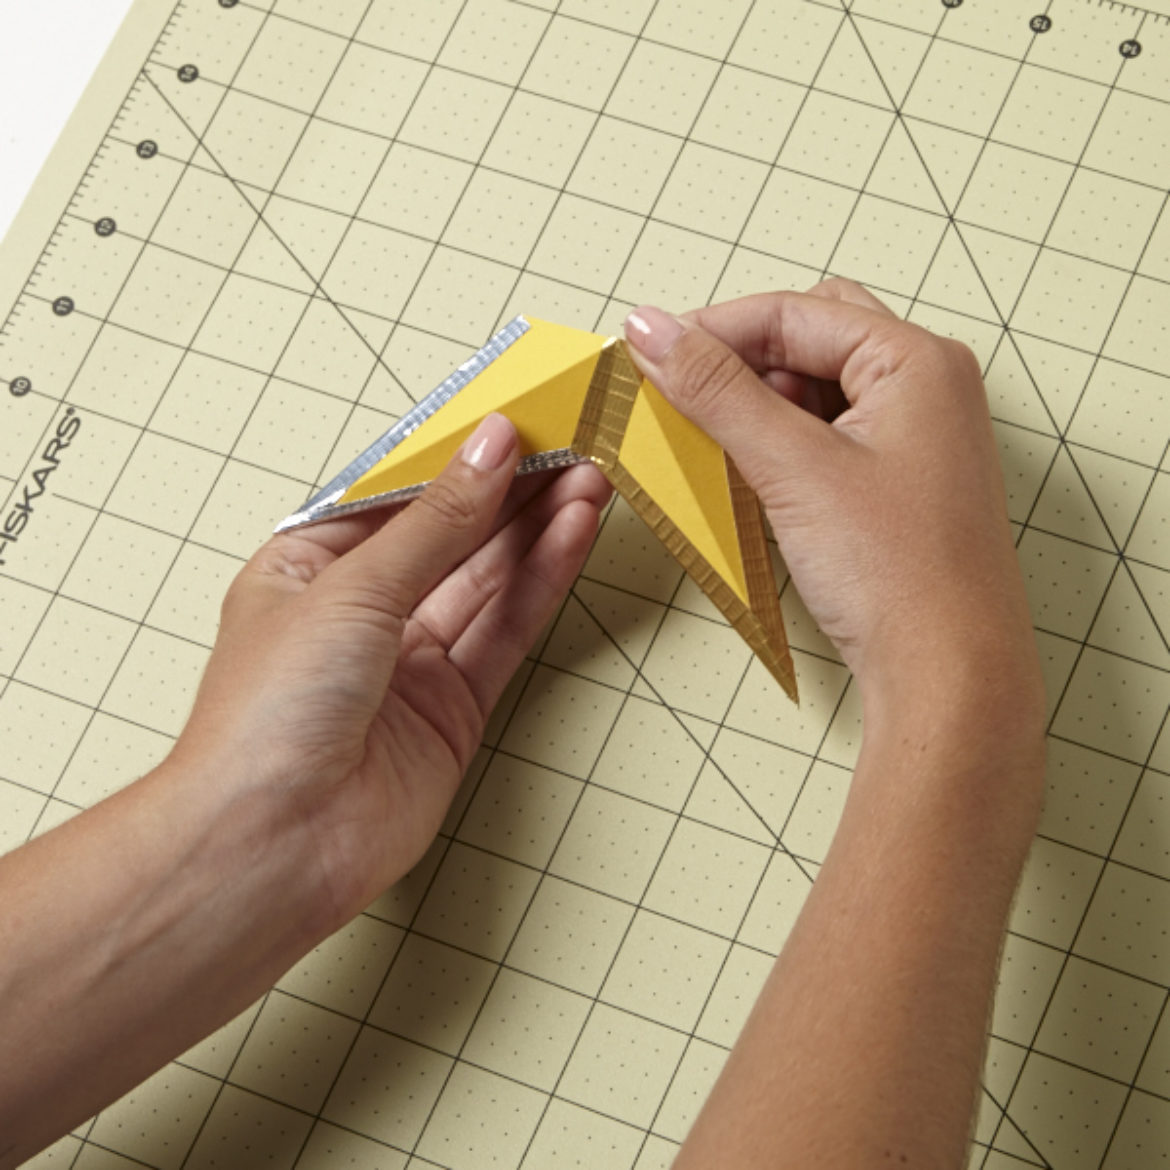
Step 6
Begin taping the 3D shapes together with .5 in wide pieces of Duck Tape®.
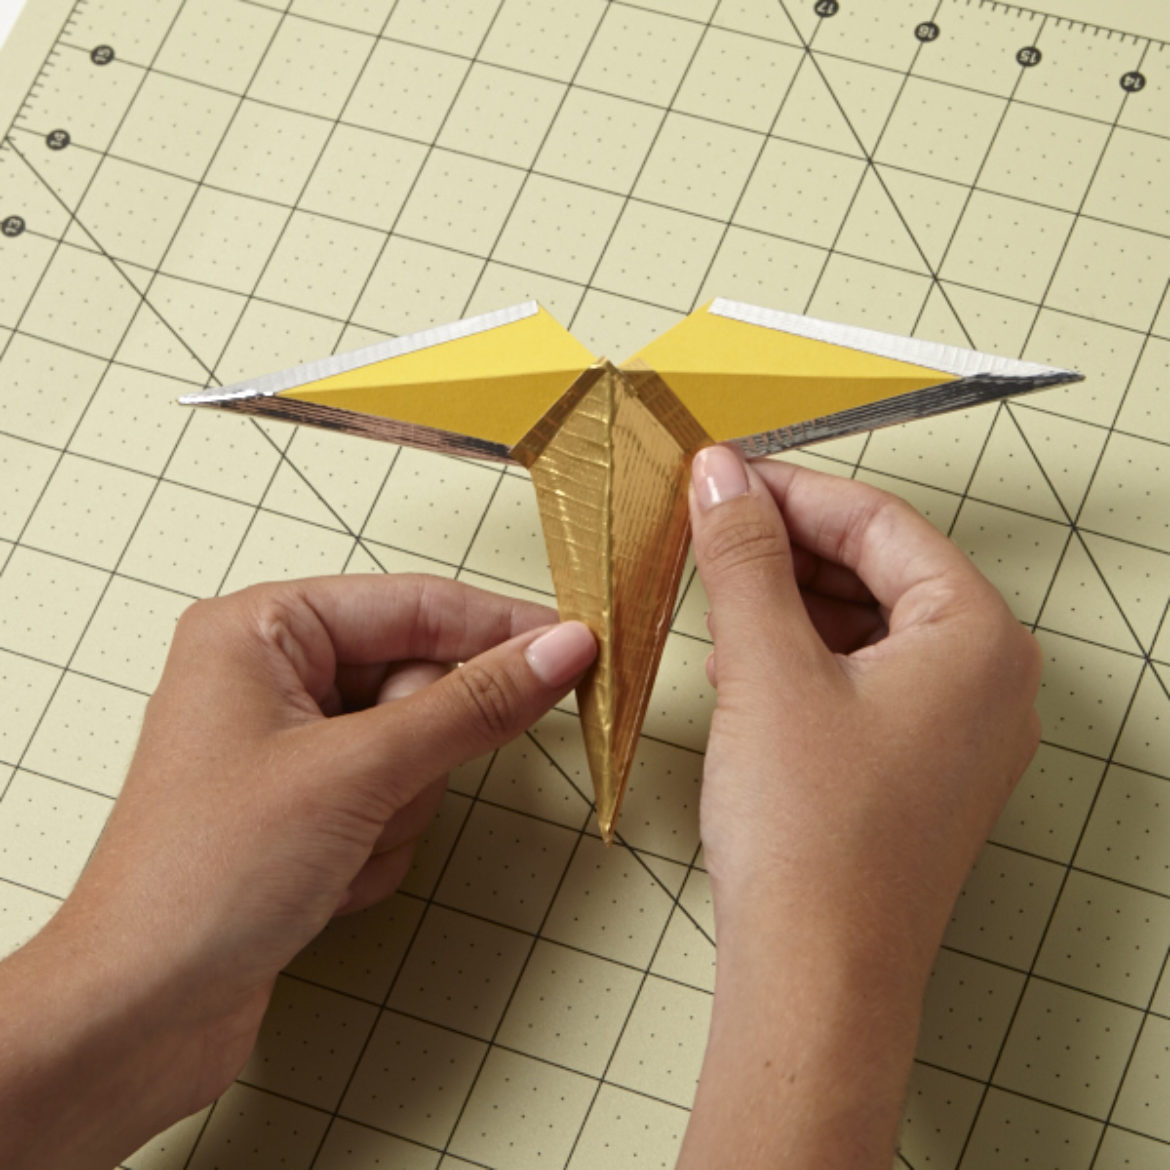
Step 7
Once you have three pieces taped together, cover the middle piece with Duck Tape® to add stability. As you continue to add a point to the star, make sure to cover the new middle piece with Duck Tape®.
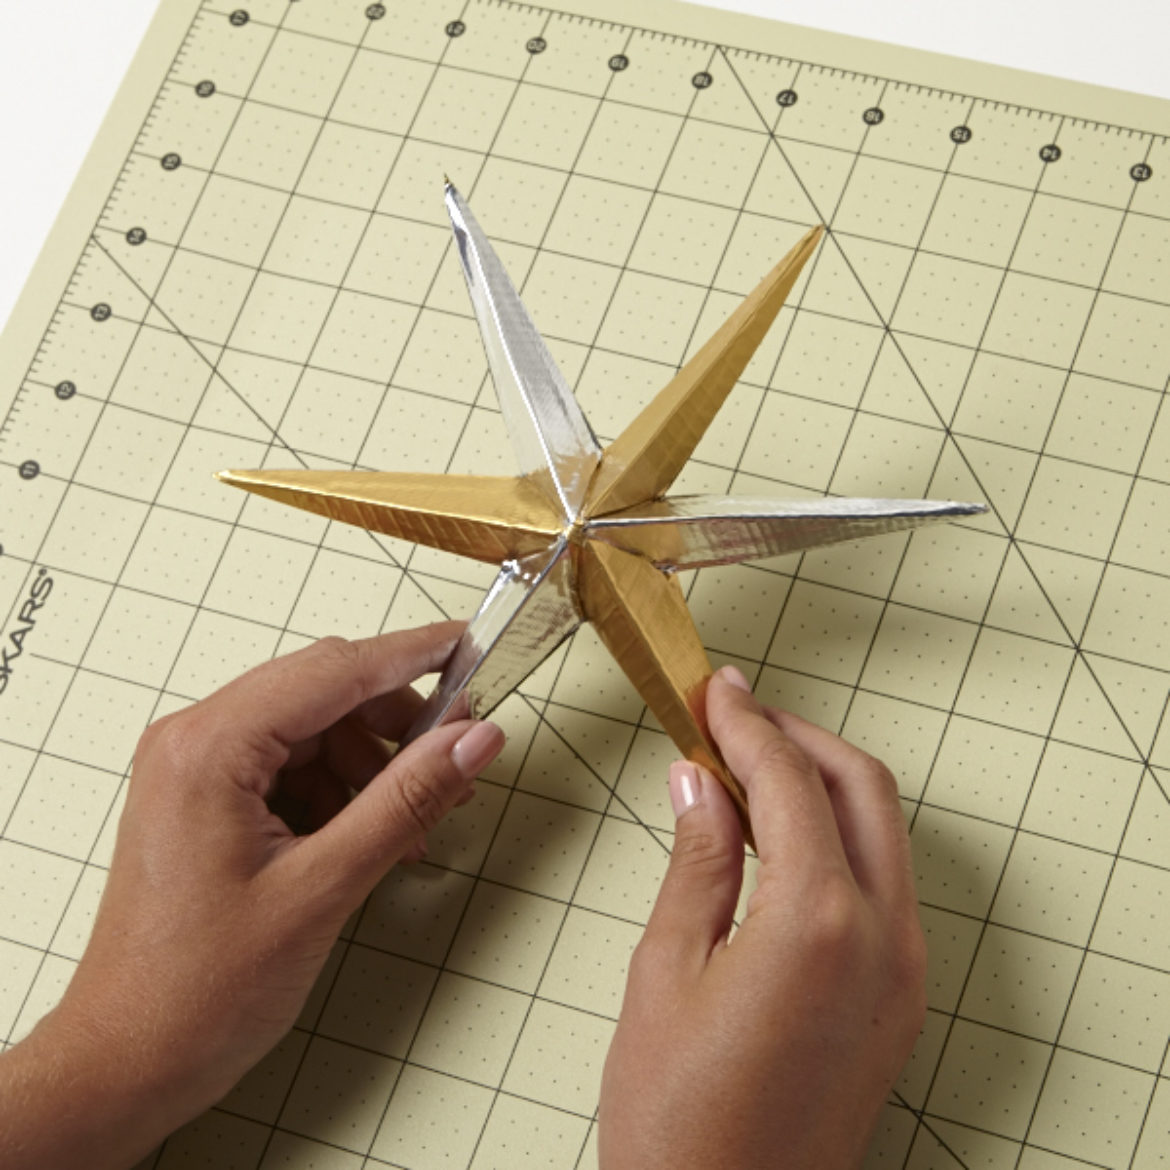
Step 8
Once you have your star put together, finishing covering the last points in Duck Tape®.
Step 9
Repeat these steps with different colors, prints and sizes. Add wire to your stars if you want to hang them, too!