How-To: Barbie® Box Costume
How-To: Barbie® Box Costume
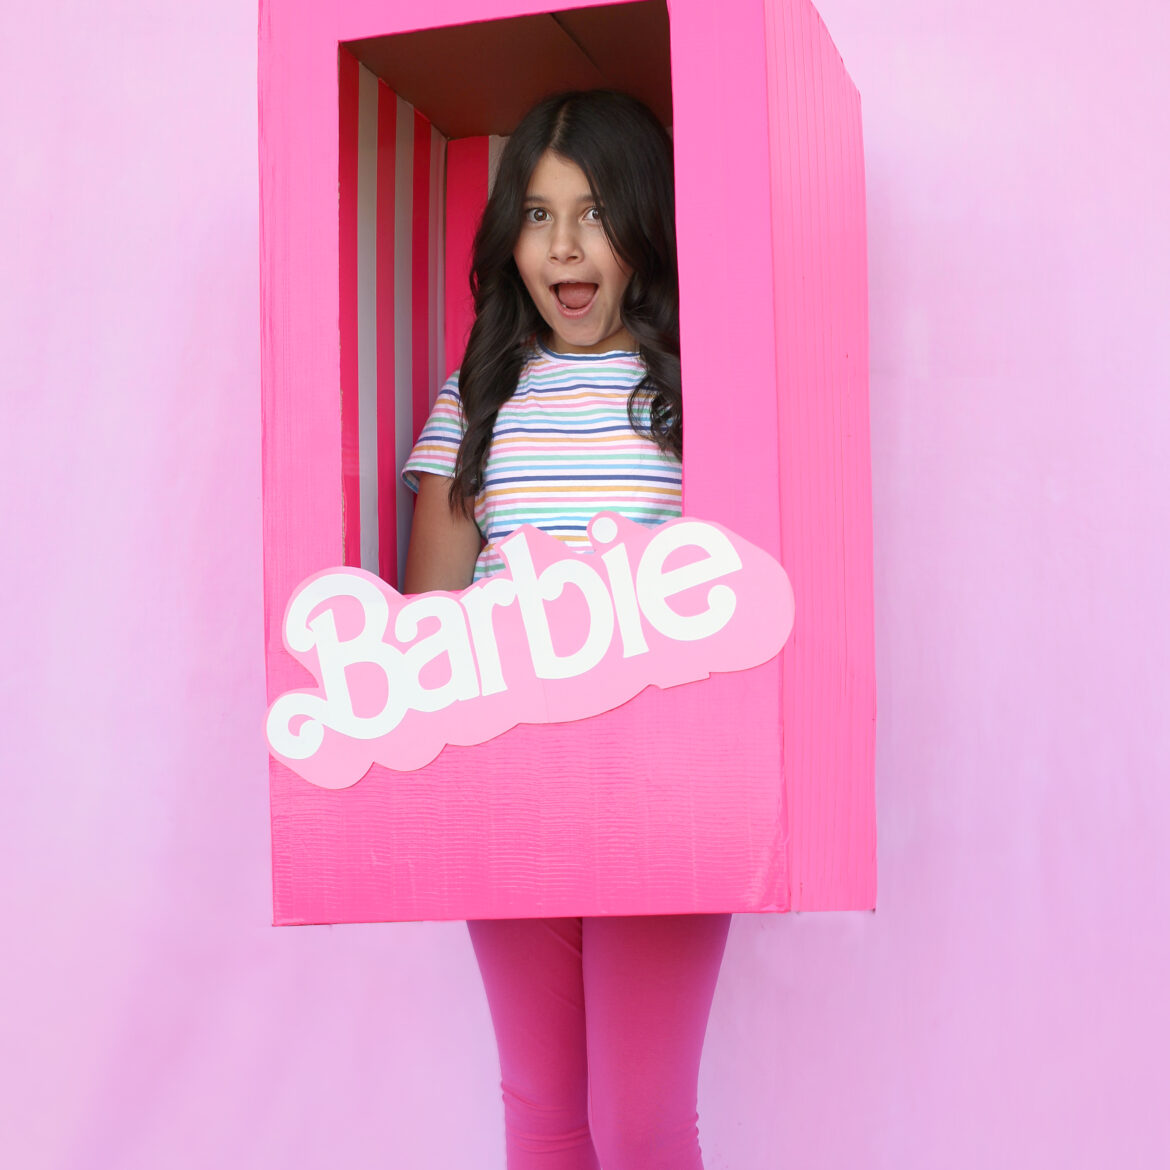
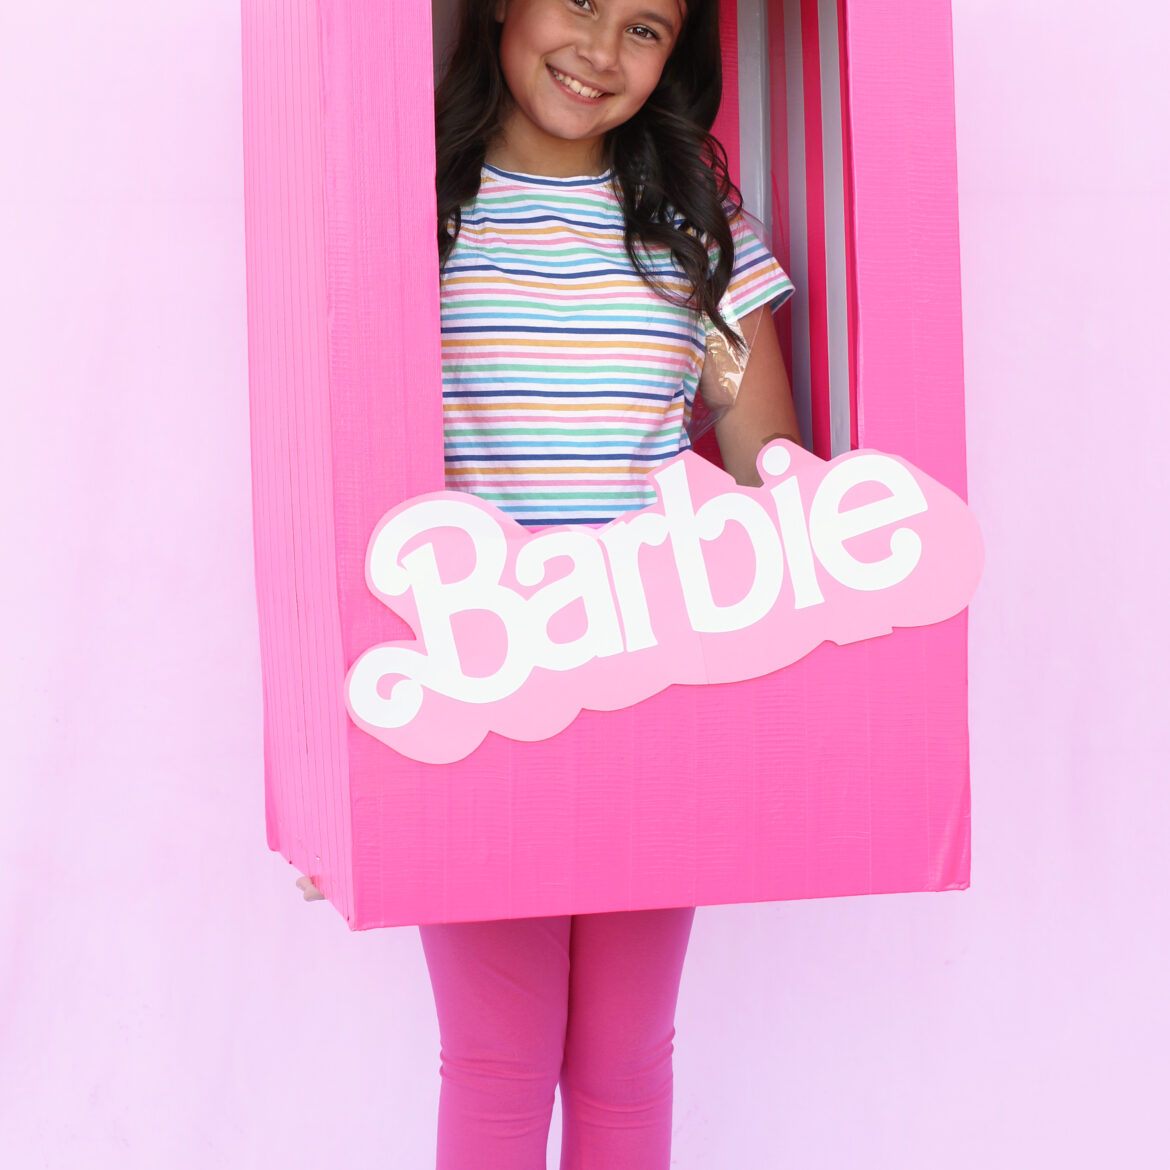
Do you want to feel like a Barbie® girl in a Barbie world? Now you can with this Barbie Box Costume made using Duck Tape®!
Tutorial
Beginner
15 Minutes
Supplies & Tools
- Color Duck Tape® - Neon Pink
- Color Duck Tape® - White
- Craft Knife
- Duck® Brand Kraft Box - Brown, 18 in x 18 in x 24 in
- Duck Max Strength® Packing Tape with Dispenser - Clear
- Pencil
- Pink Cardstock
- Ruler
- Scissors
- White Cardstock
Scroll down for step-by-step directions.
Disclaimer - If the listed tape type is not available, there's no need to worry. All of our crafts can be adjusted to use whatever tape you have on hand!
Directions
Step 1
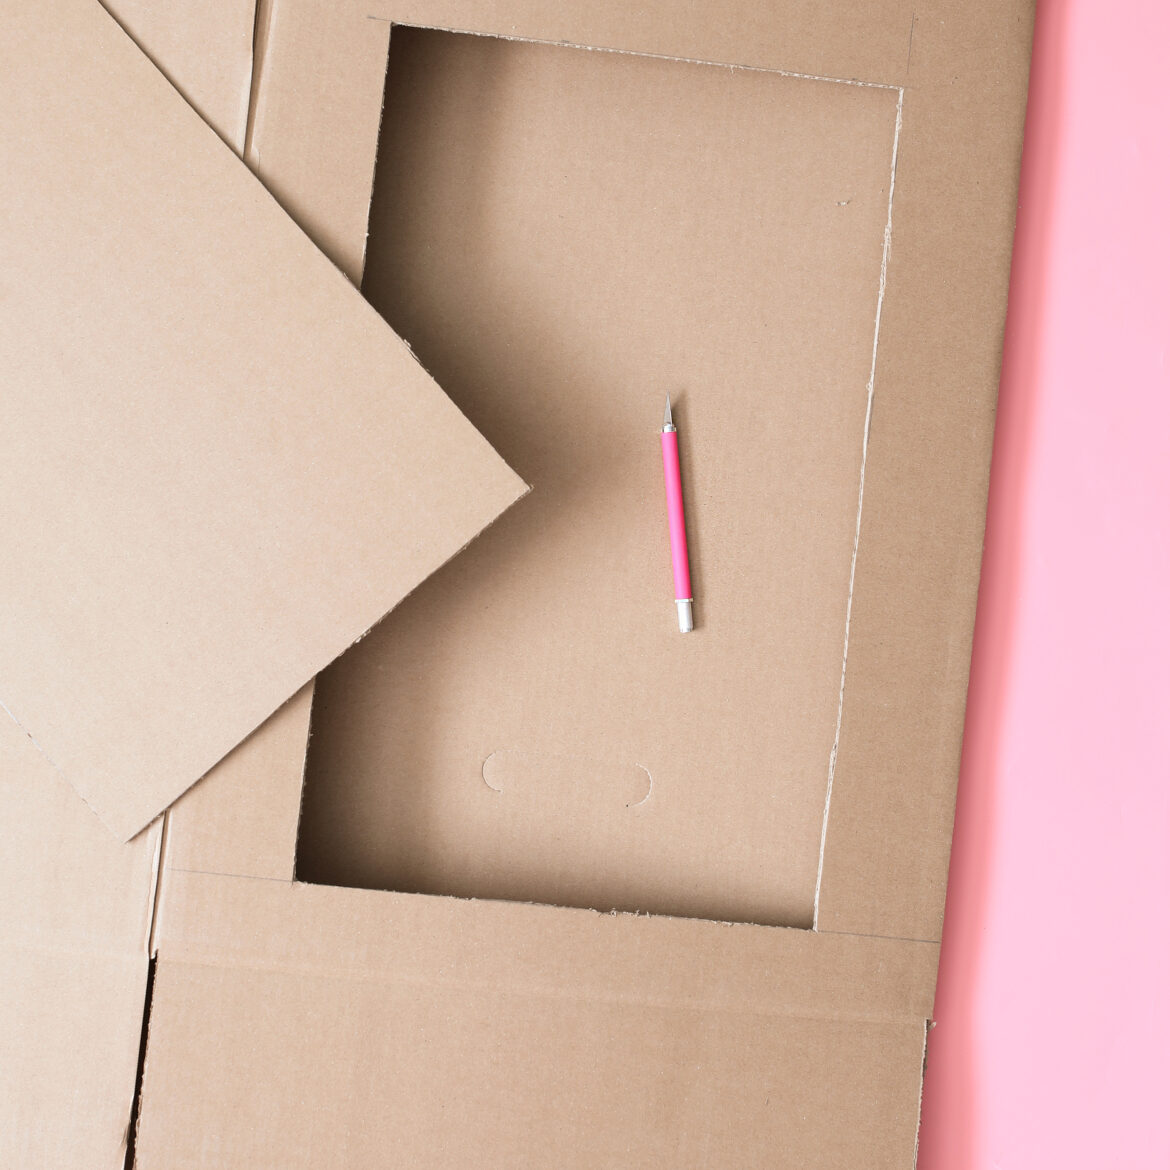
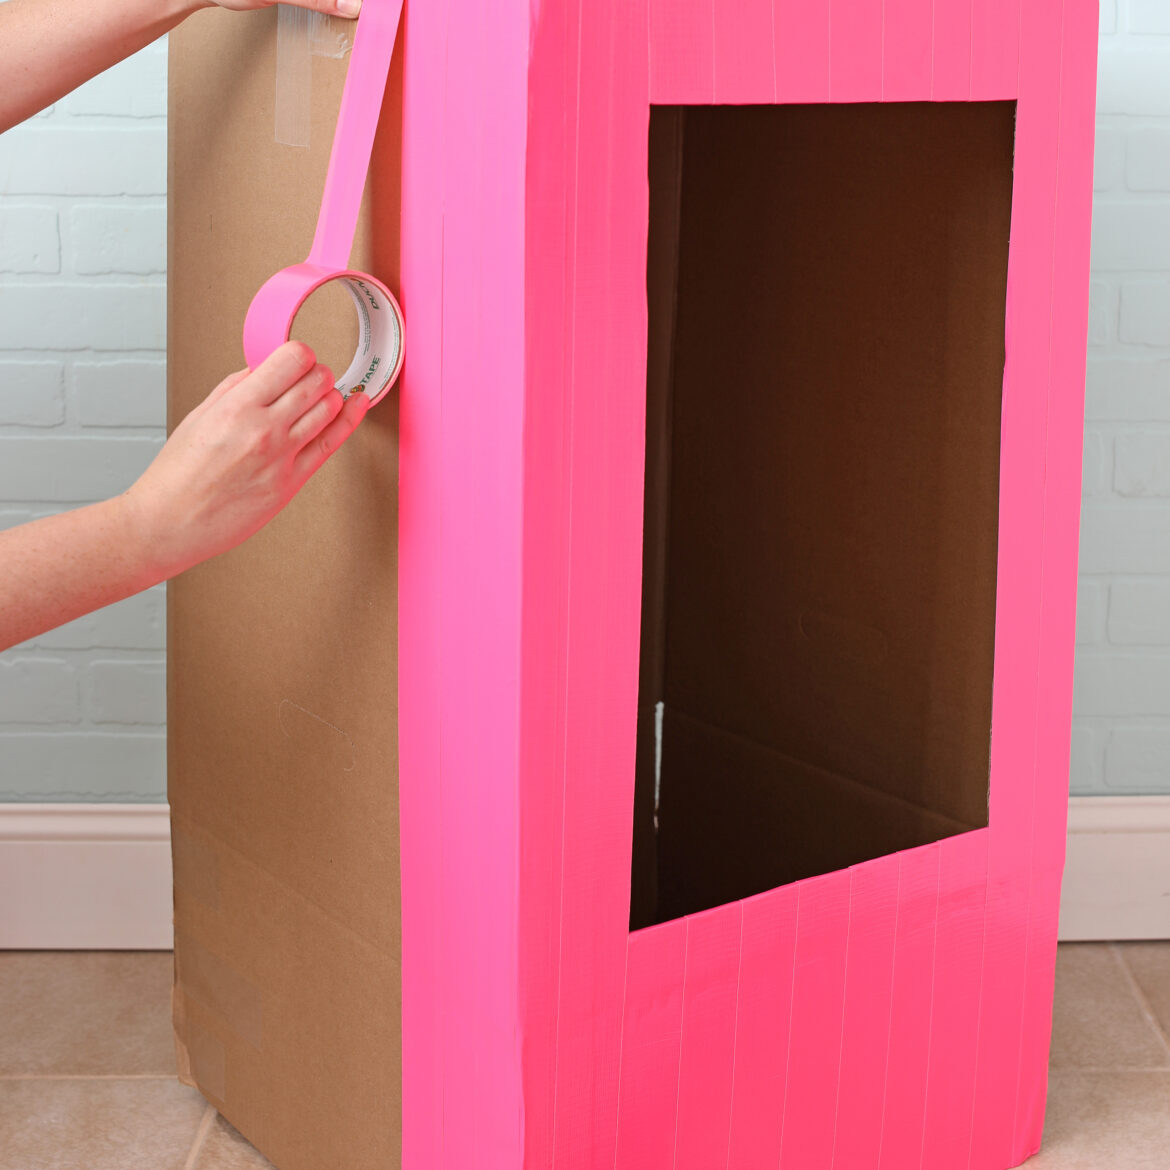
First, use a ruler and pencil to draw a 12 in x 19 in rectangular window onto one side of the box and carefully cut it out using a craft knife.
Step 2
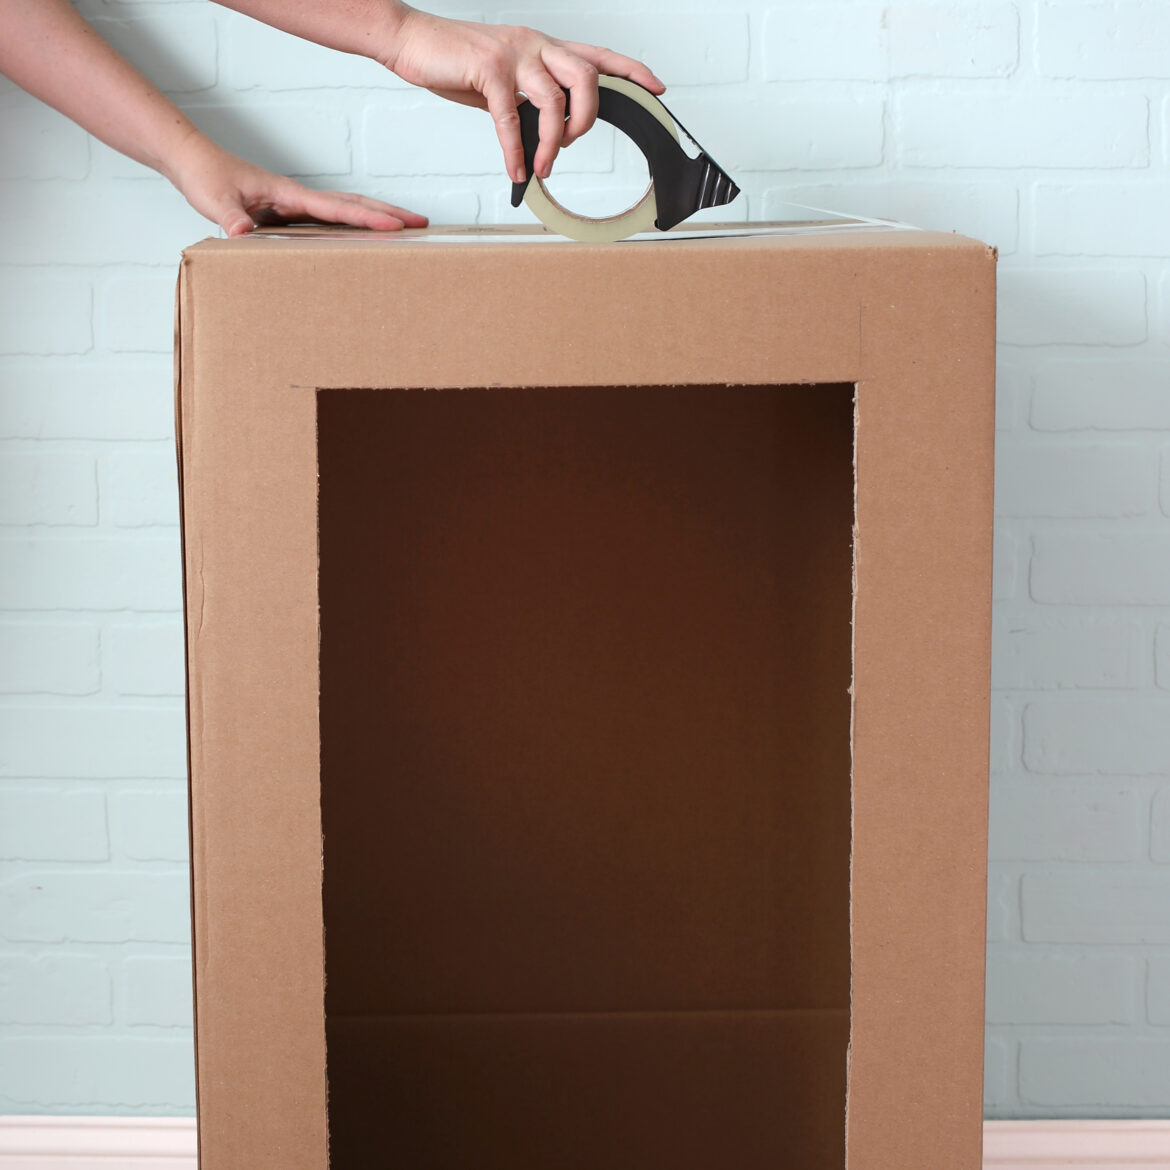
Next, open the box and tape the top flaps down. Do not close the bottom flaps of the box.
Step 3
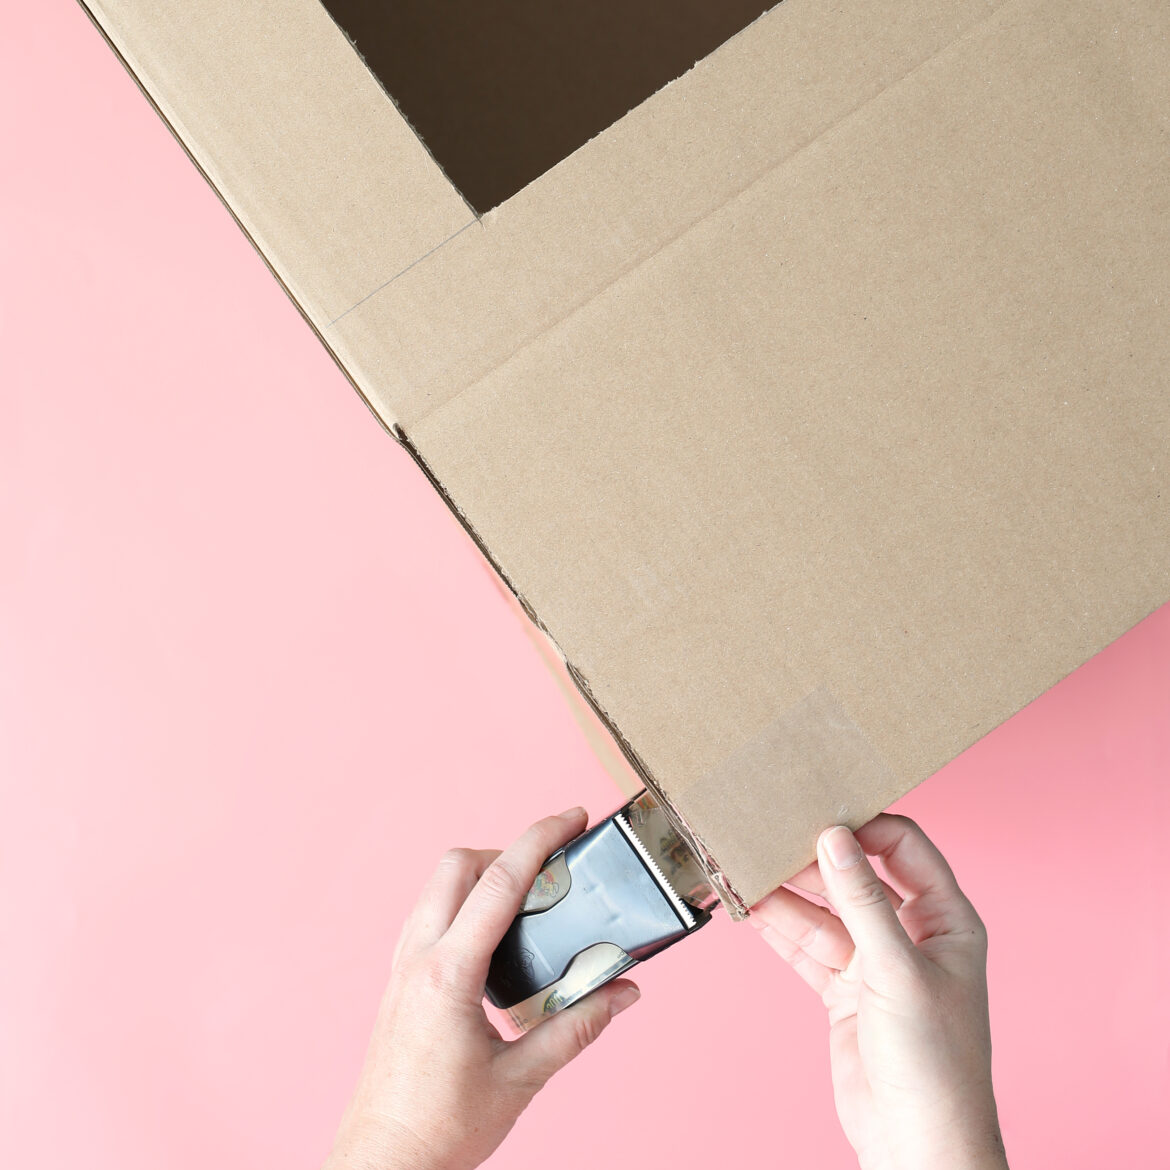
Tape the edges of the bottom flaps together at each corner to elongate the shape of the box - it should have an open bottom.
Step 4
After that, it's time to apply Duck Tape®! Cover the entire box in Neon Pink Duck Tape. You can add a decorative stripe design to the inside of the box by alternating strips of pink and white duct tape.*
*Duck® Brand does not recommend the use of duct tape on corrugate for permanent applications.
Step 5
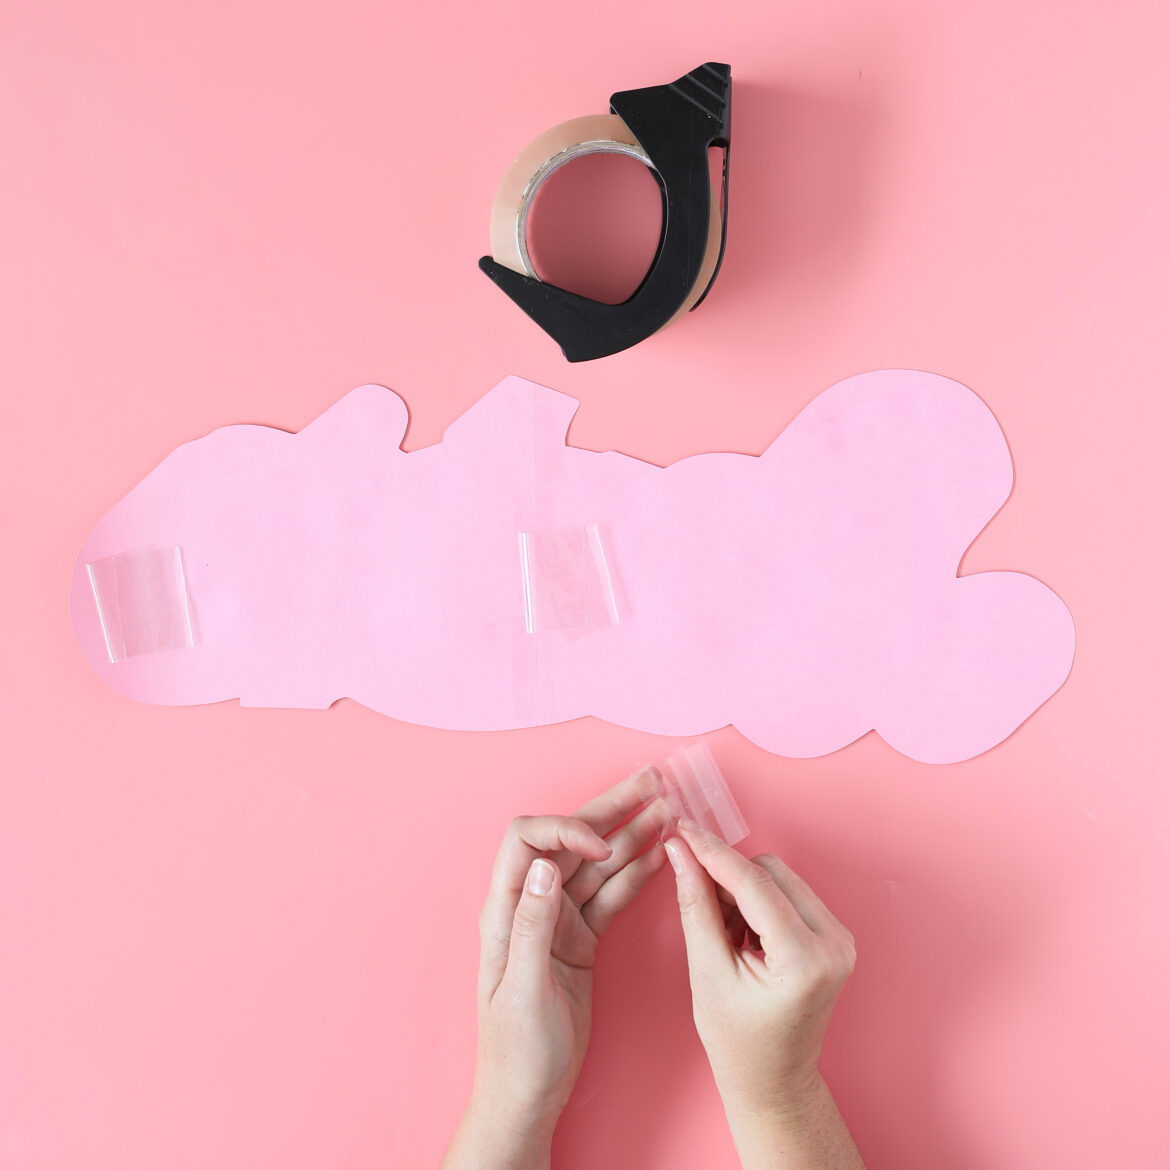
Print and/or trace the Barbie® logo onto cardstock. Cut it out and tape it at a diagonal to the front of the box below the window.
Step 6
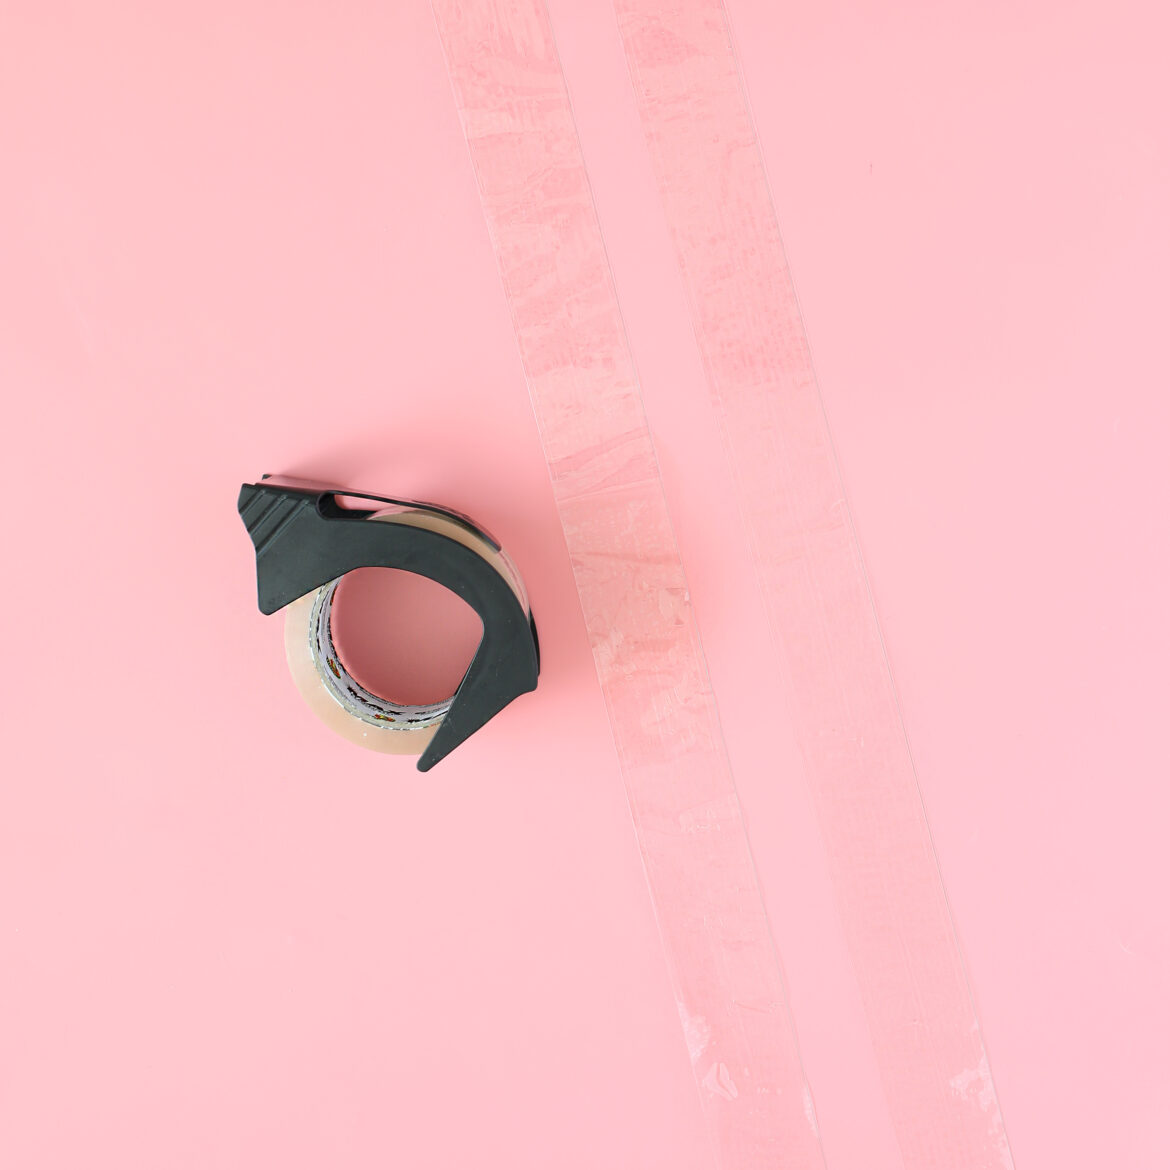
Finally, make straps by cutting long strips of clear packing tape and sandwiching the sticky sides together. Cut slits in the back of the box and slide the straps through. Adjust to fit and tape the straps in place.
Step 7
Now, you're pretty-in-pink and ready-to-go!
Barbie is a registered trademark of Mattel, Inc.