
3 Easy Steps to Create an Organized Hat Wall
3 Easy Steps to Create an Organized Hat Wall
With the many different types of shapes, sizes and materials of hats, keeping them stored in an organized fashion can be tricky. To avoid the cluttered mess of hats in her child's closet, Abby, from Abby Organizes, turned empty wall space into a hat wall for an easy and decorative solution.
For a tool-free way to hang these accessories, Abby from Abby Organizes used Duck® Brand EasyMounts™ Interior Drywall J-Hooks. Everything you need is right in the package, Duck® Brand EasyMounts™ Interior Drywall J-Hook features easy-to-follow instructions to install in seconds — just stick, pin & slide. A built-in bubble level helps ensure you're hanging the product perfectly straight. Plus, the entire system is completely removable and only three pin holes remain, which is much less damage than wall anchors or adhesive hanger mishaps. Tool-free and easy to install, EasyMounts™ lets you to ditch the toolbox and get your mind out of the clutter!
Check out the steps below to see how Abby created an organized and decorative hat wall.
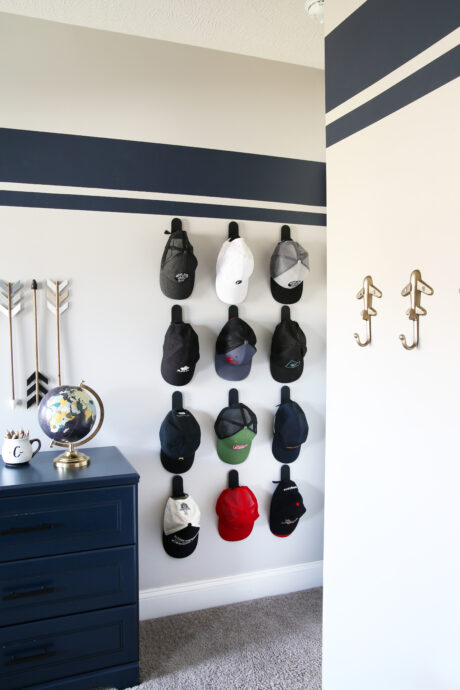
1. Measure. First, decide how many hats you want to hang then measure your wall and use a pencil to mark the planned placement of the Duck® Brand EasyMounts® J-hooks. Abby used 3 hooks across and 4 hooks down in each column, for a total of 12 hooks.
2. Stick, pin & slide. Once you plan the placement of the hooks on your wall, grab an EasyMounts® J-hook and peel the paper from the back of the base plate. Then use the built-in level to help as you attach the plate to the wall with the adhesive backing. Using the magnetic helper, push the pins into the three available locations on the base plate. Then slide the EasyMounts® J-hook over the base plate and into place.
3. Repeat. For each hook, repeat the process. Once all of the J-hooks are installed, you can hang up your hats and enjoy your newly organized space!